Instructions for creating and configuring a bot in BotFather
How to create and configure a bot in BotFather: register a new bot, get the API token, set name, avatar and description, and revoke or delete it.
What is BotFather
BotFather is the main service in Telegram, through which all user bots are registered. An unlimited number of bots can be registered on any account, the only condition is a unique username with the prefix “bot”, for example, “@MyFirstbot” or “@MyFirst_bot”.
How to create a new bot in BotFather:
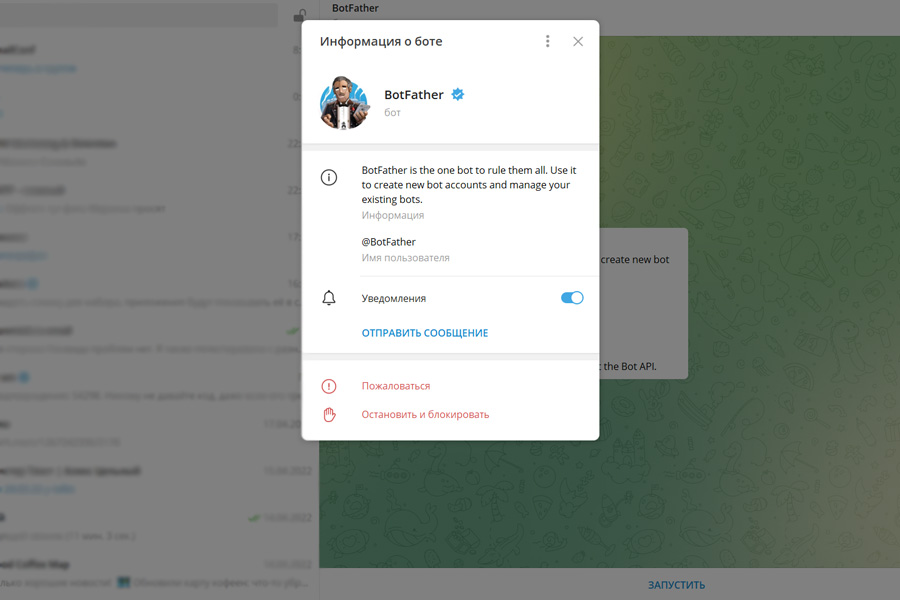
Registration takes place through the main service, which can be found in the usual Telegram search bar — “BotFather”. It is worth paying attention to the check mark, the official service should have it.
Step-by-step instructions:
open the Telegram app on any device;
enter @BotFather in the search bar;
click on the first result;
start the service using the “START” button;
in the list that appears, select the
“/newbot” command;
enter a name — this is the name that will be displayed at the top;
specify the username — it should consist exclusively of English letters and numbers, and also include the prefix “bot” in the name at the very end.
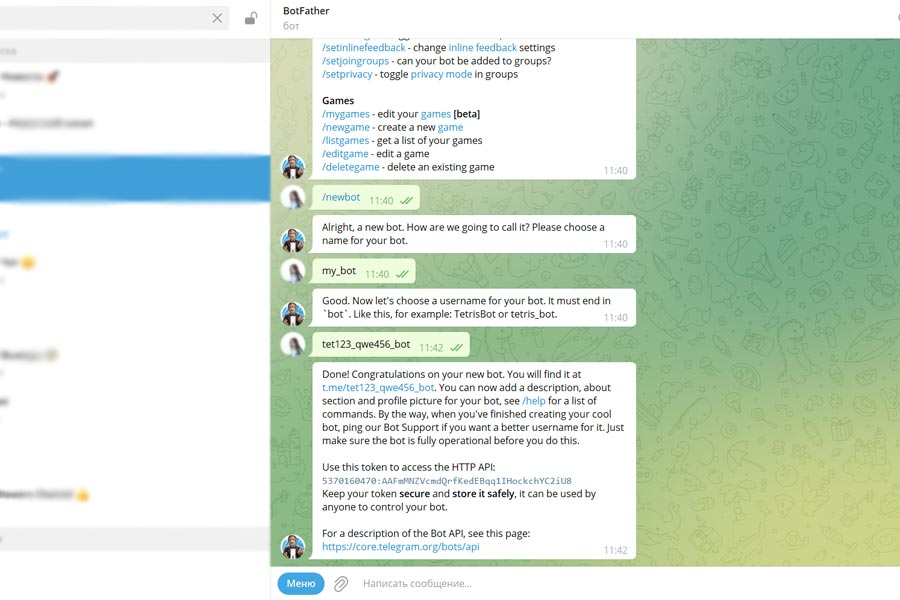
This completes the registration process, it remains to save the received token for interacting with the HTTP API via a webhook link. It will be used to send and receive messages.
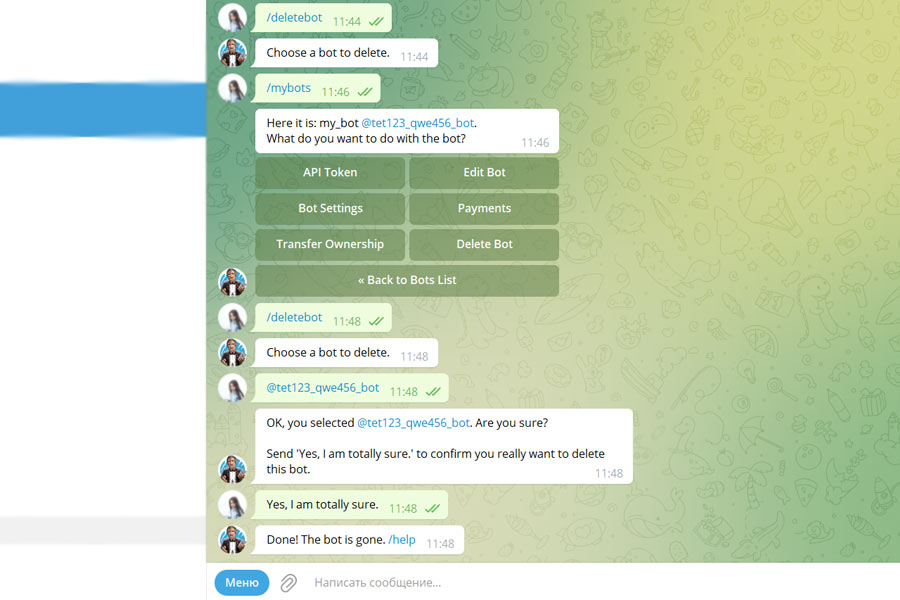
How to delete a bot:
Sometimes it may be necessary to remove bots. You can do this through the same service where the creation takes place. Step-by-step “BotFather” removal instructions:
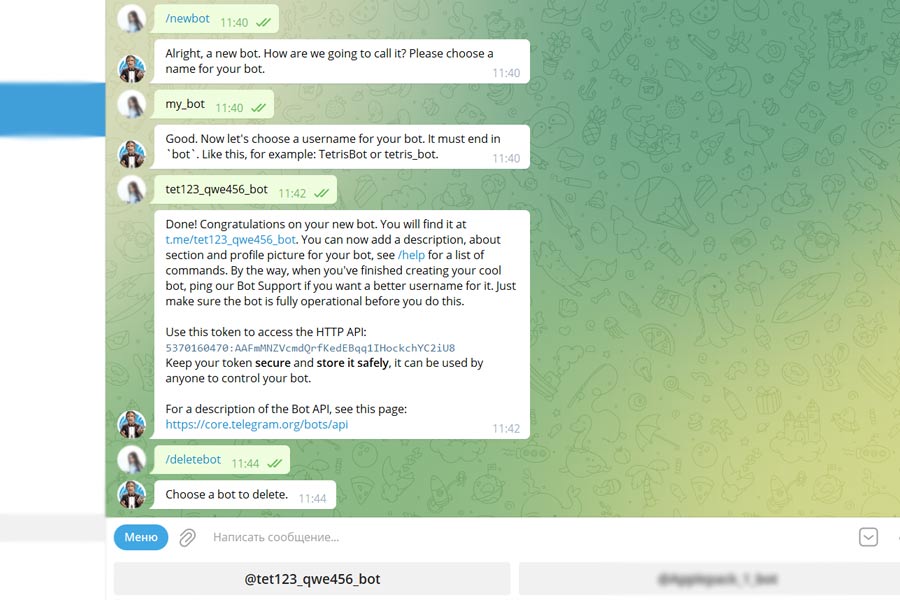
open “@BotFather”;
enter the command “/deletebot”;
select the desired object from the list that appears;
confirm deletion by entering a confirmation phrase.
All functions of Botfather (list of commands with explanation)
In addition to the usual creation of a bot, you can use the service to configure it, for example, to set an avatar and a description.
Basic
These commands start the stages of creating a new and editing existing bots.
“/newbot” — creates a new one.
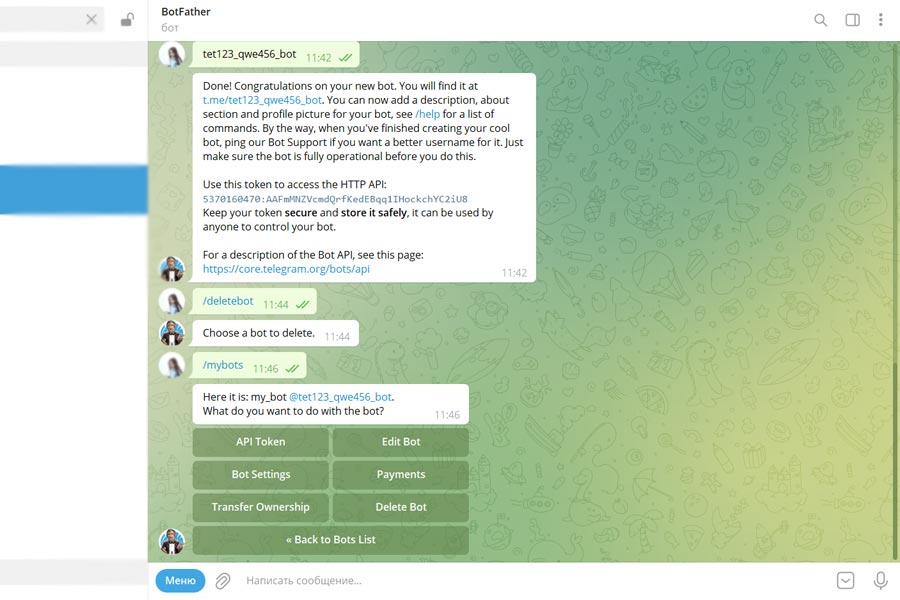
“/mybots” — allows you to see a list of existing ones and manage settings.
The last command will bring up a list of all available bots that can be edited. There you can find the following features.API Token — will show a valid token.
Editing — changing all the basic settings, for example, the name or avatar. Settings — additional settings
Transfer rights — with this function, you can transfer the bot to another Telegram user.
Editing the created bot:
In this block, the main configuration of the bot in the Telegram via BotFather takes place. Commands are triggered if you pre-select an object using the command “/mybots”.
“/setname” — sets the name. It will be displayed at the top.
“/setdescription” — sets the description. You can find it in the profile.
“/setabouttext” — sets the text that the user sees before clicking on the “START” button.
“/setuserpic” — sets the avatar. You need to send the file as a regular compressed image of any format.
That is, first comes the command, and then the name that will be displayed in the bot menu. However, if they are not specified in the “BotFather” Telegram, they will still work, but the user will not be able to find out about their existence.“/deletebot” — allows you to delete the bot. To delete it, you will need to confirm the seriousness of your intentions by entering a keyword. It will be sent in response after entering the command.
Settings
This block allows you to configure the basic parameters of the bot. For example, you can generate a new token if it was lost or fell into the hands of intruders.
- “/token” — displays the current token.
- “/revoke” — generates a new token. You should be careful about this command, because it instantly generates a new one. That is, it does not require additional confirmations.