Configuring cascades in RadistWeb
Configure cascades in RadistWeb: set the messenger order, pick connections, manage access rights, and control how the delivery cascade runs across channels.
Where is the Cascade:
The order of messengers and the choice of connections for the cascade are configured in the personal account of RadistWeb.
The new subsection is located in the Settings → Cascade.
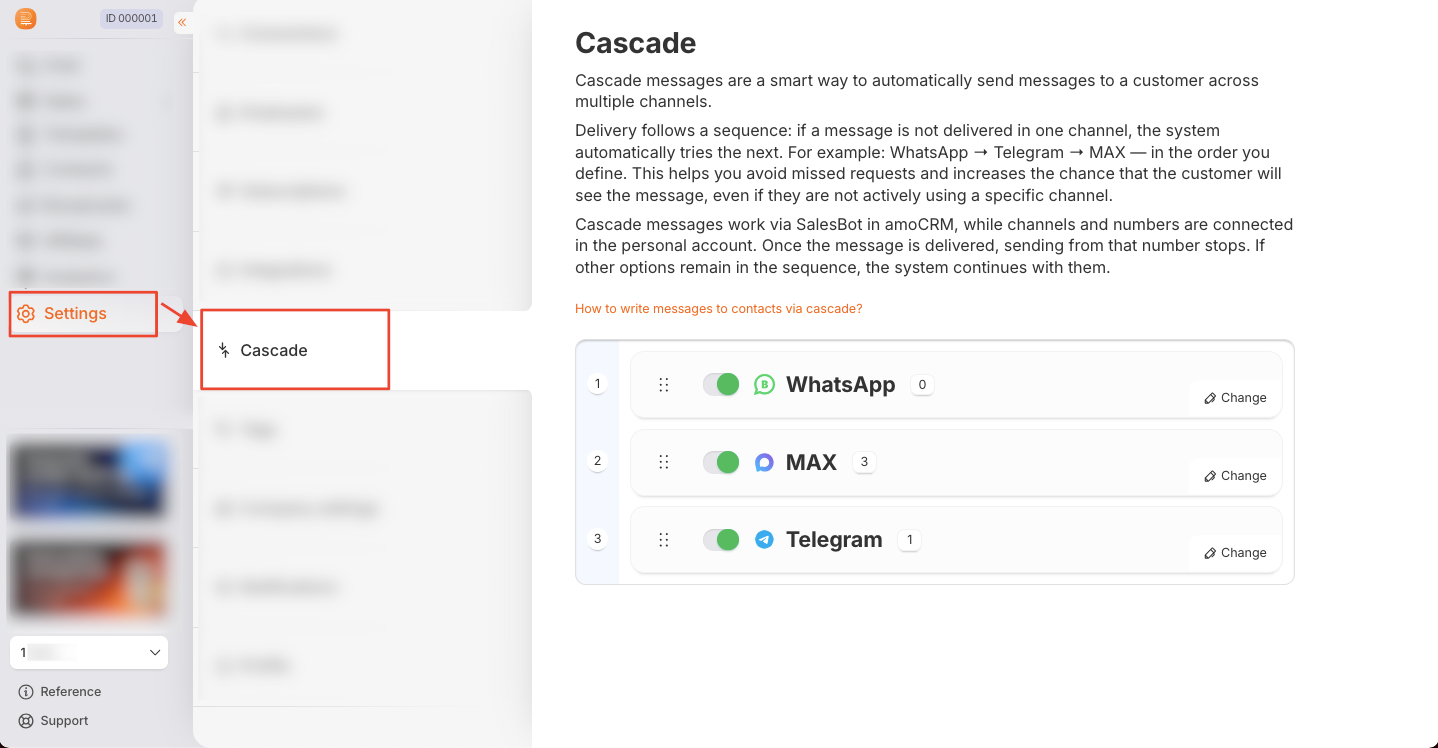
The cards of the messengers for which subscriptions have been created (WhatsApp Business, Telegram Personal, MAX) are displayed here.
Access rights
There is a new Cascade group with two levels in the access rights section.:
- View: allows you to see the section and settings.
- Editing: allows you to change the order, enable/disable messengers, and select connections.
The dependency logic is configured automatically: enabling editing activates viewing, and disabling viewing deactivates editing.
⚠️ Access to the cascade is impossible without Viewing
For more information, see the instructions: “Available rights for roles”
How to set up the order of sending
- Moving messengers: Use the “move” button in the upper-left corner of the card to set the desired message sending sequence.
peremeshchenie-podklyucheniĭ-v-kaskade.mov
Example
1. Telegram
2. WhatsApp
3. MAX
→ the system will try Telegram first
- Enabling/disabling the messenger: use the switch on the messenger card. The disabled messenger will be skipped when sending the cascade.
The changes are applied immediately.
otklyuchenie-podklyucheniya-v-kaskade.mov
How to set up specific connections
- Click the “Edit” button on the messenger card.
- A form opens with a list of all connections of this type.
- Check the boxes for the connections that should participate in the cascade.
&#xNAN;The connection status is displayed in color:Статус Значение 🟢 In the subscription Works 🔴 Not in the subscription Will not send 🔴 Subscription not paid for Will not send
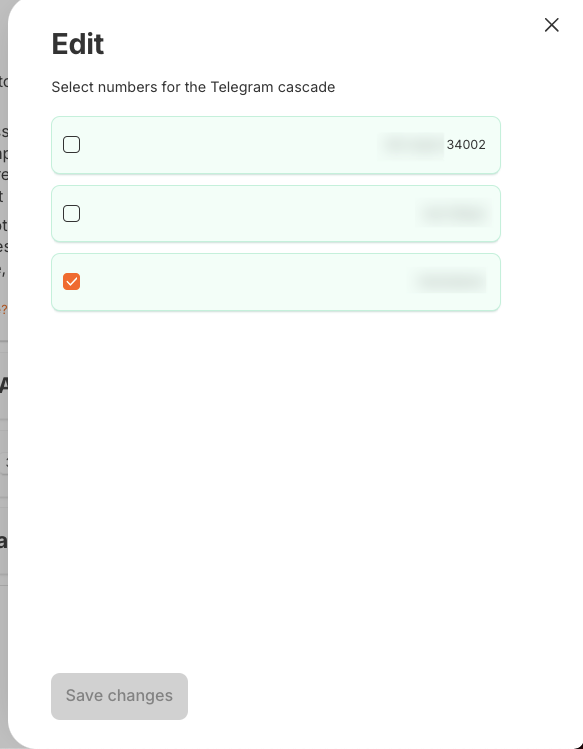
- Click “Save changes”.
Важно:
- When creating a new connection, it is not added to the cascade by default. In order for the connection to participate in the cascade, it must be manually enabled in the settings of the messenger card via the “Edit” button and check the box next to the desired connection.
- Even the “red” connections can be enabled — they will start working after payment/correction.
The logic of cascade operation:
Step 1. Choosing a messenger
The first active channel from the list is taken
Each messenger is a stage of the cascade:
1 stage → 2 stage → 3 stage💡 Important
Top-down order = priority of sending
The first channel is the highest priority
🔥 Recommendation
Put the most “deliverable” channel first (for example, Telegram)
Step 2. Connection Selection
- all available connections are taken
- the next one is selected in turn
TG1 → TG2 → TG3 → TG1 → TG2 ...the next one is selected in turn
- don’t overload one number
- distribute shipments evenly
Step 3. Dispatch and verification of delivery
The system creates a chat and sends a message. Then it waits for the status “Delivered” up to a maximum of 1 minute. If the status is not received, the stage is marked as “not delivered”, and the cascade proceeds to the next messenger.
Step 4. If not delivered
→ go to the next messenger
Step 5. Completion
The cascade stops if:
- The message has been delivered
- channels have ended
After successfully configuring the cascade, you can start configuring the message in Kommo. 😉
➡️ Use the instructions “How to set up and work with cascades in Kommo”